Contact HighSight Team


You will get reply within 48 hours.
Your email ID will not be used for any other purpose.
Your email ID will not be used for any other purpose.
You can email us directly. Our email address: elaine@chinahighsight.com
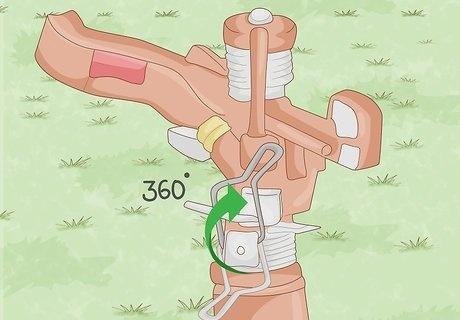
Rotate clockwise to reduce water volume, counterclockwise to expand coverage; adjust the screw and wrench for precise control of the spray range, and combine with the diffuser and deflector shield to adjust the distance and curvature; the 360-degree mode allows you to easily and efficiently water your lawn. Understanding how to adjust Pop-up sprinkler is key to achieving optimal results.
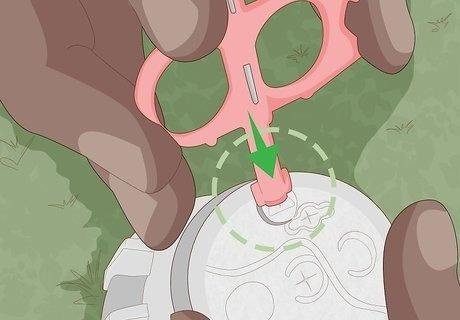
01.Adjust the nozzle
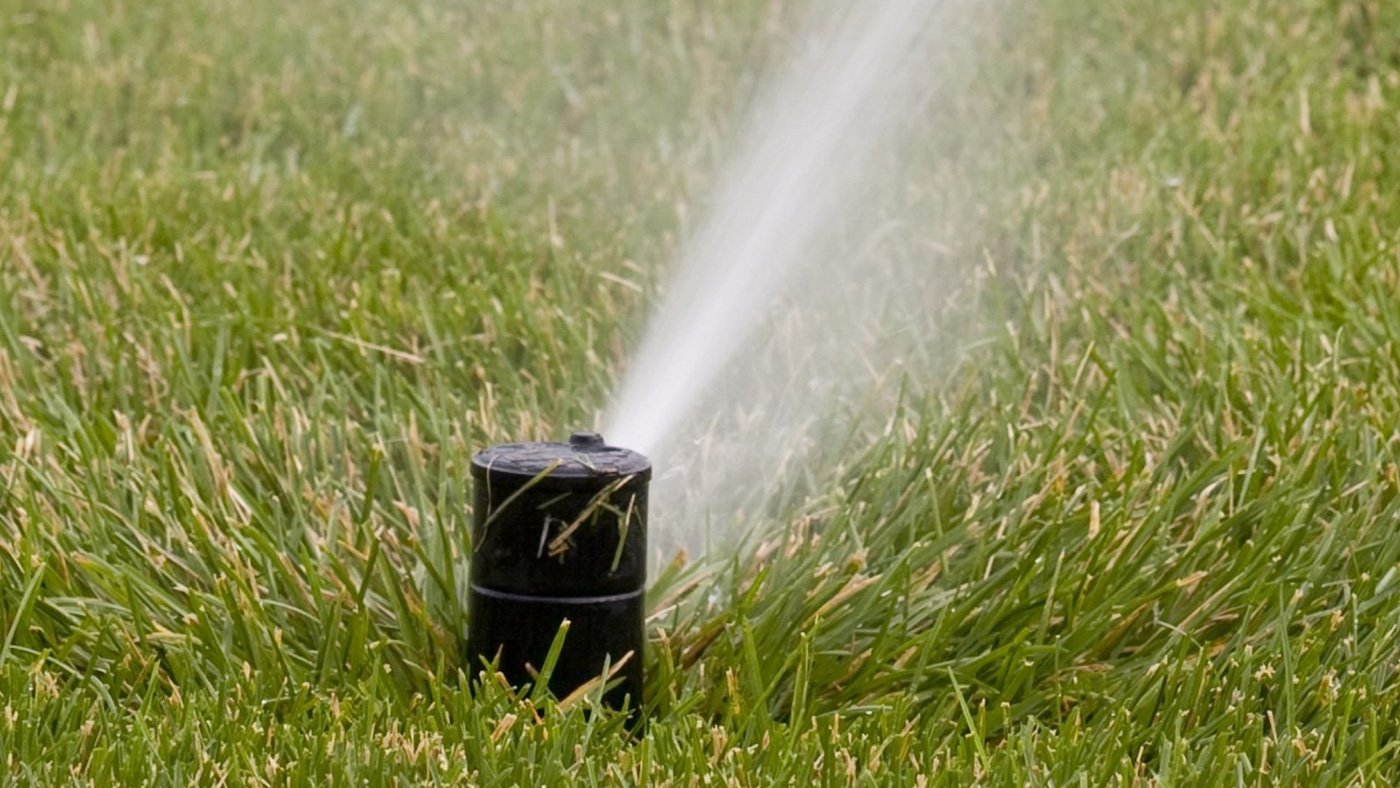
How to adjust Pop-up sprinkler
1. Turn on the sprinkler and see what adjustments need to be made. Make sure the water supply is set to the level you would actually use when watering. Before making any adjustments, observe how much coverage your sprinkler provides. Learning how to adjust Pop-up sprinkler can enhance your irrigation efficiency.
2.Adjust the arc clockwise to reduce the amount of water applied. Grasp the edge of the nozzle with your thumb and forefinger and rotate it to the right to reduce the arc of the water. Perform this adjustment on a specific area of the lawn.
3.Rotate the nozzle counter-clockwise in an arc to increase water coverage. If you want your sprinkler to cover both sides of the lawn, rotate the nozzle to the left. Place your thumb and forefinger on the nozzle and rotate until a complete fan-shaped arc is formed.
4.Turn the screw on the nozzle head clockwise to reduce the radius. To adjust it, use a flathead screwdriver and insert it into the screw in the center of the nozzle. Turn the screw clockwise to shorten the spray distance.
5.Turn the screw counterclockwise to increase the radius. The more times you turn the screwdriver, the farther the spray will go.
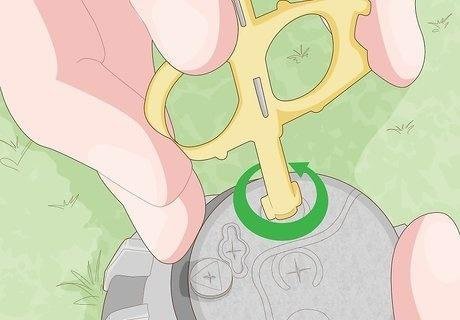
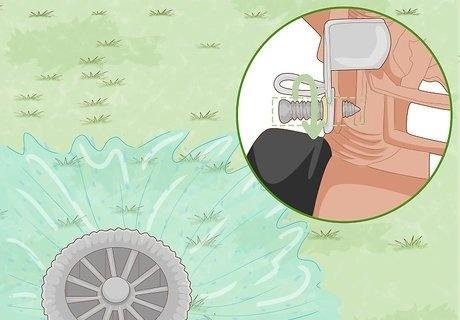
02.Repair rotor head
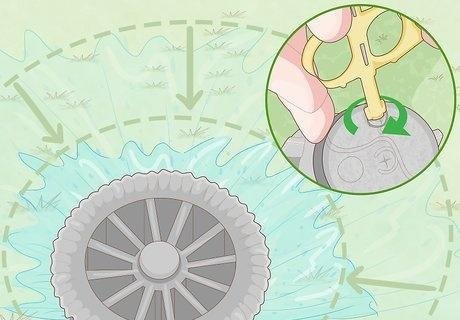
1.Insert the wrench into the raised arrow to adjust the spray. Your rotary nozzle should come with a double-sided adjusting wrench. One side of the Allen wrench is used to adjust the spray radius. Locate the raised arrow on the top of the nozzle and insert the Allen wrench into it. Turn the wrench clockwise to decrease the spray radius.
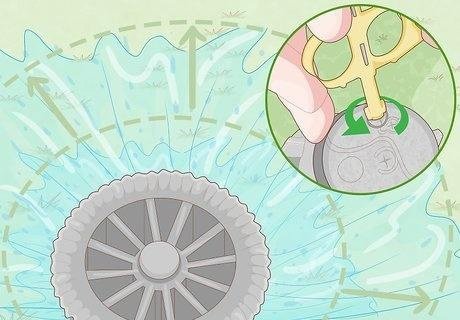
2.Turn the wrench counterclockwise to increase the spray volume. To increase spray coverage, insert the Allen wrench into the hole indicated by the top arrow and turn it to the left for a longer spray distance. Make this adjustment when you need to water plants several feet away from the sprinkler head.
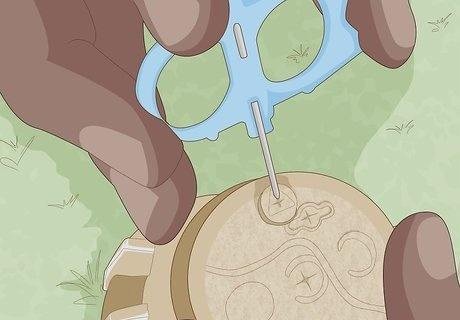
3.Insert the other end of the wrench into the nozzle head to adjust the curvature. The other end of the wrench is called the plastic T-head. It inserts into another hole at the top of the nozzle head. There is a plus or minus sign next to this hole. When you insert the plastic T-head, rotate it slightly so that it sits flat in the hole. Rotate the wrench to the plus side to increase the spray coverage.
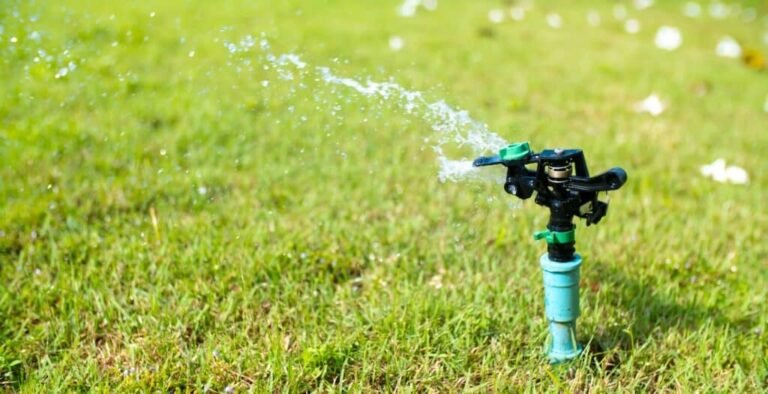
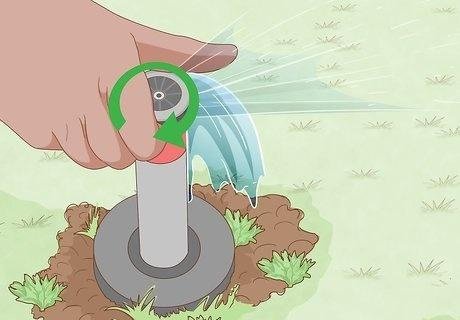
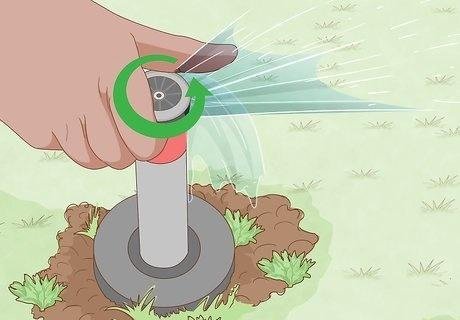
03.Test impact nozzle
01.Adjust the water flow to affect the spray distance. Turn the water source knob to the right to increase the water flow. Turn it to the left to decrease the water flow.

02.Adjust the diffuser screw to shorten the spray distance. To turn it, hold the nozzle head with your non-dominant hand and turn the diffuser screw to the right to reduce the spray distance.
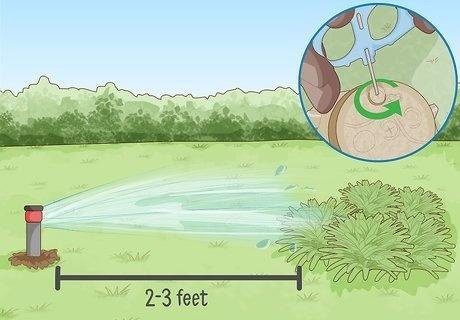
03.Use the deflector shield to adjust the curvature of the water. The deflector shield is a flat metal plate located above the diffuser screw. To increase the water’s travel distance, raise the deflector shield as high as possible. To shorten the travel distance, push the deflector shield down a few teeth.
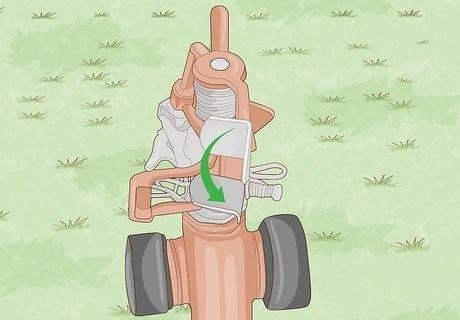
04.Turn the limit switch to the top to get the full 360-degree spray pattern. It is thinner at the top and curved in the middle. To create a 360-degree spray pattern, flip it upwards and lock it in place.