Installing butterfly stake rotating micro sprinklers is simple and efficient. Follow this detailed guide to ensure optimal irrigation performance and system longevity.

1. Assemble the Sprinkler Components
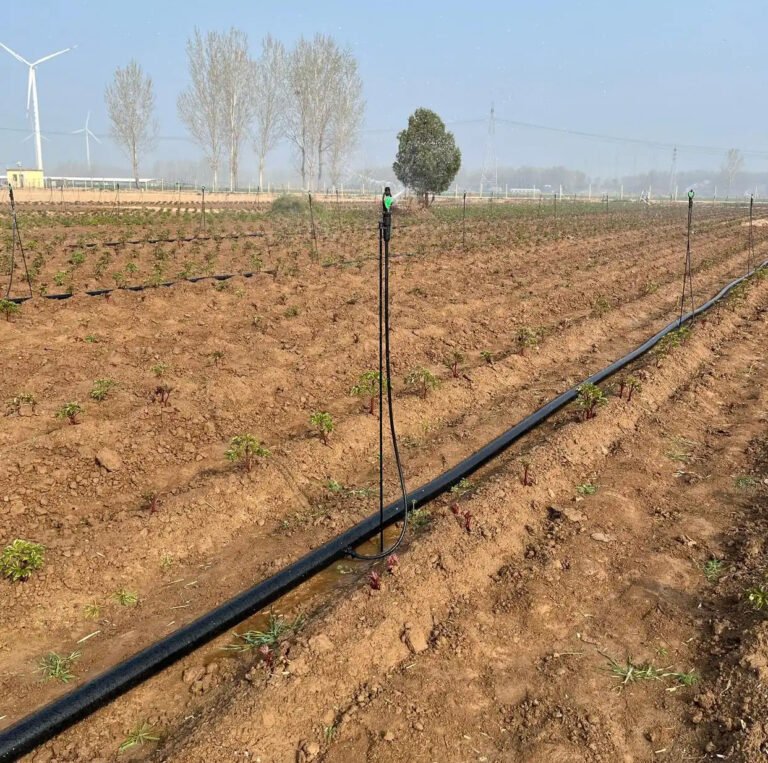
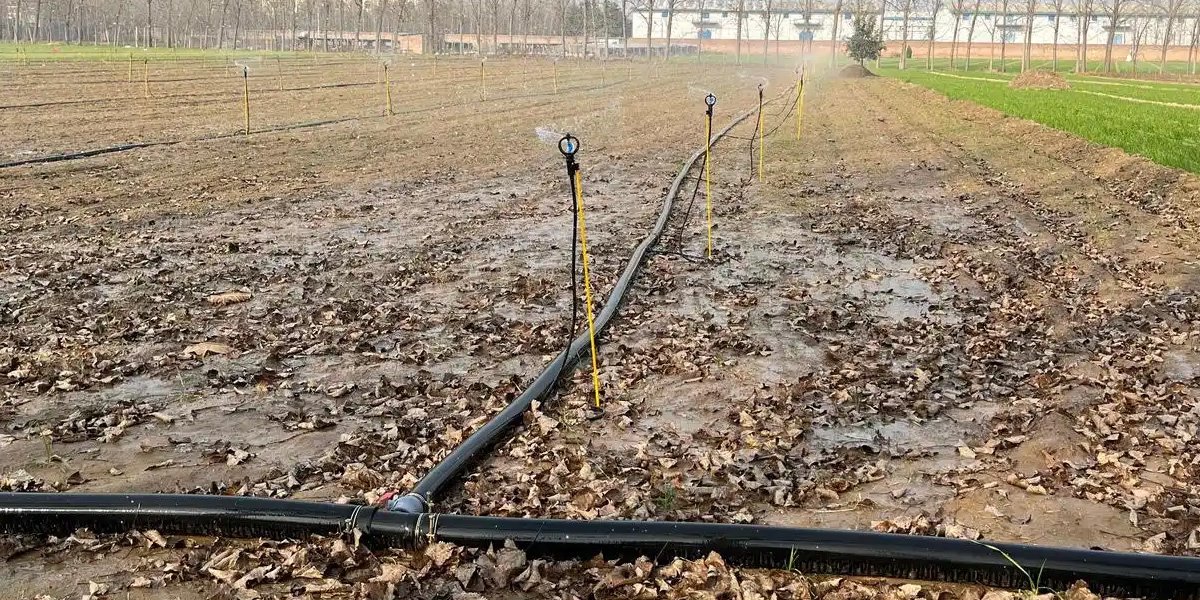
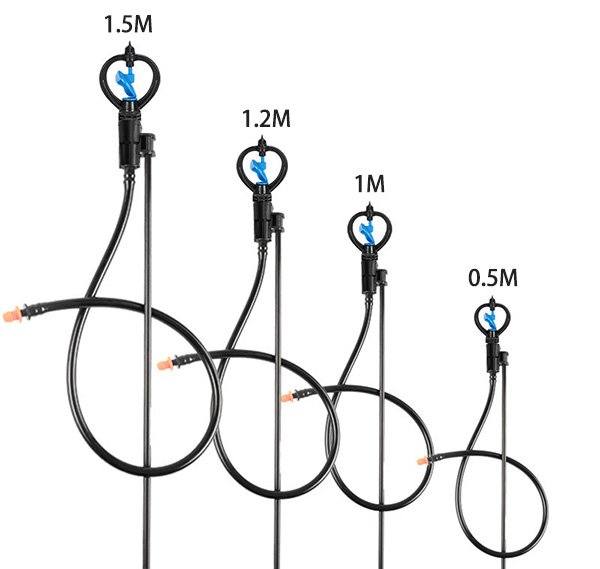
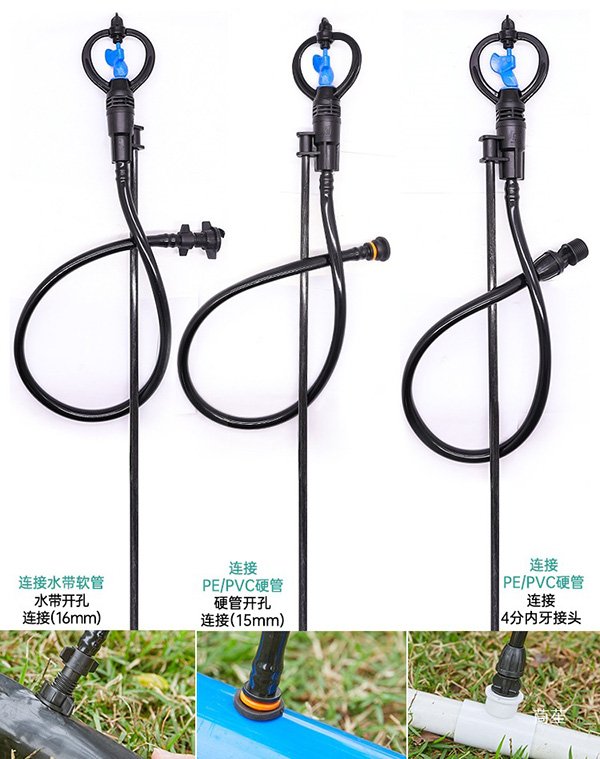
Start by connecting the fiberglass stake (available in 0.5m,1.0m, 1.2m, or 1.5m lengths), microtube (8×11mm), and necessary connectors to the sprinkler body. Ensure all fittings are secure to prevent leaks.
Pro Tip: For certain models, install a diaphragm anti-drip valve to stop post-shutoff dripping and conserve water.
Available Assembly Types (Choose Based on Your Setup):
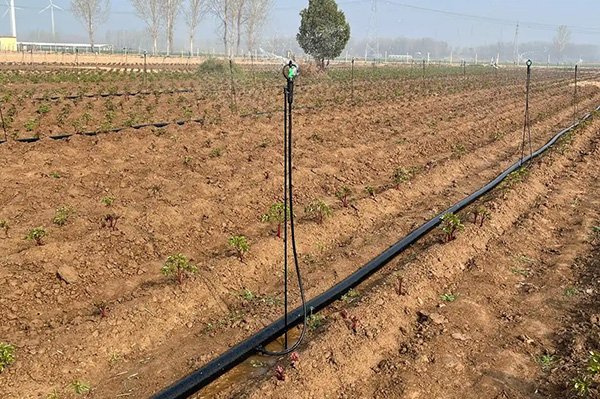
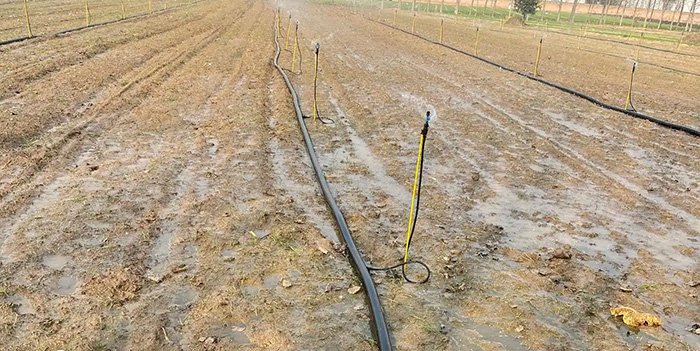
Direct Stake Mount: Ideal for standard garden beds and row crops.
Elevated Extension Mount: Suitable for raised beds or container gardens.
Low-Profile Ground Mount: Best for ground-cover plants or delicate seedlings.
2. Measure, Position, and Punch Holes
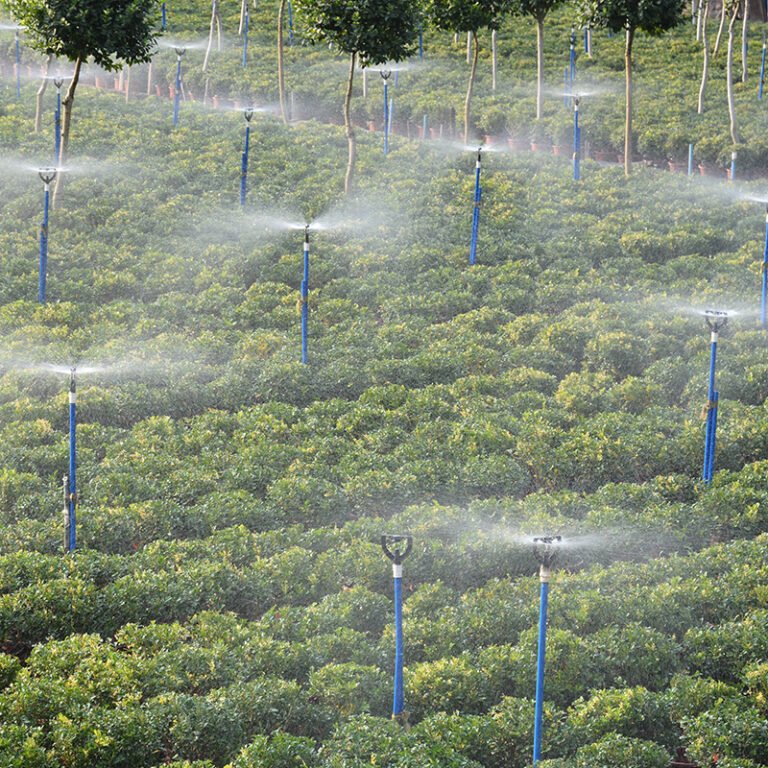
Plan your sprinkler layout according to your irrigation needs. Recommended spacing is 3–5 meters between sprinklers for even coverage.
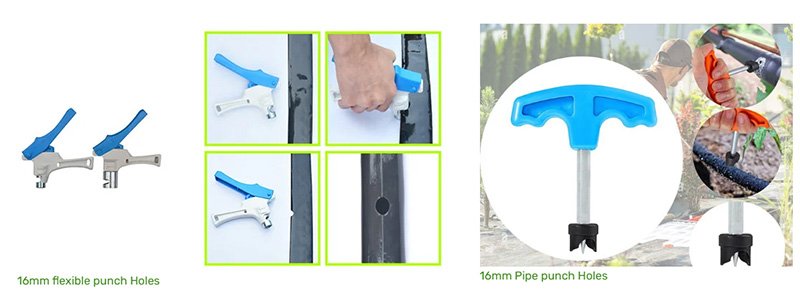
Use a specialized hole puncher to create clean, correctly sized holes in the irrigation tubing or planting area.
3. Secure and Connect the Sprinkler
Insert the fully assembled sprinkler into the prepared hole. Adjust it to a level position and firmly compact the soil around the stake for stability.
When connecting to your irrigation network, ensure the water flow direction is correct to prevent reverse installation, which can lead to clogging and reduced performance.
4. Verify Performance and Adjust
Turn on the water supply and check that:
The sprinkler head rotates smoothly.
The spray pattern covers the target area evenly.
Make minor positional adjustments if needed to optimize coverage.
Why Choose Our Butterfly Stake Rotating Micro Sprinklers?
✅ Durable fiberglass stakes – resistant to corrosion and weathering
✅ Adjustable spray patterns – customizable for gardens, farms, and nurseries
✅ Water-efficient design – reduces waste with uniform distribution
✅ Easy installation – user-friendly even for beginners
Frequently Asked Questions (FAQ)
Q1: What is the recommended spacing for installing the micro sprinklers? How should I plan the layout?
A: We recommend an installation spacing of 3 to 5 meters, depending on your water pressure, sprinkler model, and desired coverage area. For uniform irrigation, a square or triangular layout pattern is suggested. Ensure the spray patterns overlap by 10-15% to avoid dry spots.
Q2: How do I correctly use the hole puncher during installation? Are there any precautions?
A: Always use the specialized hole puncher provided or recommended to create clean, precise holes with smooth edges in the lateral tubing.
Key Steps:
Ensure the pipeline is depressurized and clean.
Press down vertically with a firm, swift motion.
Insert the connector immediately after punching to prevent debris from entering the pipe.
Important: Using a dull or improper tool can cause irregular holes, leading to leaks or poor connections.
Q3: Why is it crucial to pay attention to the water flow direction? What happens if it’s installed backwards?
A: Butterfly stake sprinklers are designed with a specific internal channel and turbine mechanism. Reverse installation (connecting the inlet to the outlet) will:
Disrupt the rotation: The sprinkler head will not spin or will spin erratically.
Cause clogging: It can trap debris inside the sprinkler body, leading to blockages.
Reduce efficiency and coverage: Water distribution becomes uneven and ineffective.
Always connect the microtube from the water supply to the sprinkler’s inlet port (usually marked or part of the base connector).
Q4: When and why should I install the diaphragm anti-drip valve?
A: The diaphragm anti-drip valve is essential in situations where:
Low-lying or potted plants are being watered, as post-shutoff drips can cause overwatering and soil erosion.
Your irrigation system has significant elevation changes, causing siphoning and emptying of lines after shutoff.
You need to prevent water waste and ensure precise irrigation control. It automatically seals the water path when pressure drops, eliminating residual dripping.
Q5: The sprinkler head is not rotating smoothly. What should I check?
A: If rotation is poor or inconsistent, please check:
Water Pressure: Ensure pressure is within the operating range specified for your model (typically 1.0-3.0 bar). Low pressure may not drive the turbine; excessively high pressure can cause misting and unstable rotation.
Debris Blockage: Turn off the water, unscrew the sprinkler head, and rinse any sand or particles from the filter screen and turbine chamber.
Installation Angle: Ensure the stake is inserted vertically and the sprinkler is level. A tilted position can affect rotation balance.
Flow Direction: Confirm the sprinkler is not installed backwards (see Q3).
Q6: Can the fiberglass stake be cut to a shorter length if needed?
A: Yes. The fiberglass stake can be trimmed to a custom height using a hacksaw or pipe cutter for specific applications (e.g., low-profile ground cover or raised beds). Ensure the cut end is smooth to prevent damage to the microtube when connecting.
Q7: How do I winterize or store the sprinklers to prevent damage?
A: Before freezing temperatures:
Drain the system: Completely drain all water from the main lines, laterals, and microtubes.
Remove sprinklers (optional): For long-term storage or in very harsh climates, you can detach the sprinklers, clean them, and store indoors.
Blow out the system (for larger setups): Using an air compressor to blow out residual water is the most effective method for frost protection.
Q8: What maintenance is required for long-term performance?
A: Minimal maintenance ensures longevity:
Regular Inspection: Periodically check for leaks, clogged nozzles, and damaged stakes.
Filter Cleaning: Flush the system at the start of the season and clean the inlet filter of each sprinkler if water contains sediments.
Head Cleaning: Soak the rotating head in a vinegar solution if mineral deposits (lime scale) build up, then rinse thoroughly.